Grundlagen des Progressivwerkzeug-Designs: Streifenlayout, Pilotlöcher, Stationen und Streifenbreite, mit Regeln, die Werkzeugkosten und Teilequalität bestimmen.
Progressivwerkzeug-Design: Layout, Piloten und Streifenbreite Grundlagen
Kurzantwort: Ein Progressivwerkzeug verwandelt einen Streifen aus Coil-Material in einem kontinuierlichen Pressvorschub in ein fertiges Teil, wobei es Station für Station Merkmale hinzufügt, bis die letzte Station das Teil freistanzt. Das gesamte Design basiert auf drei Entscheidungen: dem Streifenlayout, dem Pilotierungsschema, das jede Station auf derselben Bezugslinie registriert, und der Streifenbreite, die das Teil ohne Verschwendung oder Schwächung durch den Prozess führt.
Progressivwerkzeuge sind der Grund, warum ein Steckverbinderkontakt Cent statt Euro kostet: Ein Pressenhub, einige hundert Hübe pro Minute, und jeder Hub ist ein fertiges Teil. Aber die Geschwindigkeit ist nur möglich, weil der Streifen mit mikrometergenauer Disziplin vom ersten Stich bis zum finalen Freistanzen geführt wird. Dieser Leitfaden behandelt die Grundlagen – Layout, Piloten, Stationen und Breite – die darüber entscheiden, ob ein Werkzeug eine Million Teile läuft oder vom ersten Versuch an Probleme macht.
Das Streifenlayout ist das Design
Das Layout ist die Zeichnung, wie Teile auf dem Streifen angeordnet sind: ihr Abstand (Teilung), ihre Ausrichtung, die Materialbrücken zwischen ihnen und die Abfolge der Stationen, die schrittweise schneiden und formen. Alles andere folgt daraus. Ein gutes Layout maximiert die Materialausnutzung und ermöglicht, dass jedes Merkmal in logischer Reihenfolge geschnitten wird; ein schlechtes Layout verschwendet 20% des Coils und zwingt Stationen, sich gegenseitig zu behindern.
| Layout-Entscheidung | Übliche Praxis | Was sie steuert |
|---|---|---|
| Teilung (Vorschubabstand) | Teillänge + Brücke + Rand | Materialverbrauch, Pressgeschwindigkeit |
| Teileausrichtung | Gedreht, um Breite und Korn zu passen | Ausnutzung, Biegerichtung |
| Brückenbreite | Typisch 1,5–2,5× Dicke | Streifenfestigkeit zwischen Teilen |
| Trägerseite | Eine oder beide Seiten des Teils | Unterstützung während des Umformens |
| Merkmalsreihenfolge | Stanzen vor Formen, Formen vor Freistanzen | Genauigkeit der Endgeometrie |
Wichtigste Erkenntnis: Das Layout ist eine Kostenentscheidung, die einmal getroffen und im Stahl fixiert wird. Material ist typischerweise der größte Kostenfaktor bei einem Stanzteil, daher ist ein Layout, das die Ausnutzung von 50% auf 65% erhöht, wertvoller als die meisten Werkzeug-Effizienztricks – und es kann nur vor dem Schneiden des Werkzeugs umgesetzt werden.
Piloten: Das Registrierungssystem
Jede Station schneidet oder formt an einer Position relativ zum Streifen. Wenn der Streifen zwischen den Stationen auch nur minimal driftet, driften die Merkmale mit. Piloten sind Präzisionsstifte, die in Pilotlöcher – früh im Streifen gestanzt – eintauchen, um die Streifenposition vor jedem kritischen Vorgang zu fixieren. Der erste Stich erzeugt das Pilotloch, und von da an ist das Loch, nicht die Streifenkante, die Bezugslinie.
| Pilotentyp | Funktionsweise | Typische Verwendung |
|---|---|---|
| Runde Piloten | Tauchen in gestanzte runde Löcher | Standard-Registrierung |
| Langloch-/entlastete Piloten | Ermöglichen Vorschubabweichungen | Lange Streifen, dünnes Material |
| Umgeformte Piloten | Pilotierung im Teil selbst | Teile ohne zusätzlichen Streifen |
| Pilot im gestanzten Loch | Nutzt ein reales Teilemerkmal | Spart Material |
Wichtigste Erkenntnis: Die Pilotierung macht den Streifenvorschubfehler – der vom Zuführgerät zehn Mikrometer oder mehr betragen kann – zu einem Nicht-Problem, da der Pilot den Streifen an jeder Station gegen das Werkzeug neu registriert. Ein Werkzeug ohne solide Pilotierung ist ein Werkzeug, dessen Toleranz vom Bandverzug des Coil-Lieferanten abhängt.
Stationenreihenfolge: Stanzen, Formen, Freistanzen
Die Stationen sind so sequenziert, dass jeder Vorgang an Material stattfindet, das noch gut unterstützt wird, und dass Umformen niemals zuvor geschnittene Merkmale stört. Die klassische Logik: Zuerst Löcher stanzen und den Umriss beschneiden, dann Biegungen und Prägungen formen und das Teil in der letzten Station freistanzen. Formen vor dem Stanzen riskiert Verformungen der Löcher; Freistanzen vor dem Formen lässt keinen Streifen, um das Teil zu halten.
| Stationstyp | Funktion | Konstruktionsregel |
|---|---|---|
| Stanzen | Schneidet Löcher und Schlitze | Zuerst ausführen, Piloten registriert halten |
| Beschneiden/Trennen | Schneidet den Umriss schrittweise | Genug Material für das Formen lassen |
| Formen/Biegen | Formt 3D-Merkmale | Rückfederung im Werkzeug berücksichtigen |
| Prägen/Kalibrieren | Glättet oder markiert | Verfestigt lokale Dicke |
| Freistanzen | Trennt das Teil | Letzte Station, höchster Verschleiß |
Wichtigste Erkenntnis: Die Sequenz existiert, um die Genauigkeit zu schützen. Ein Loch, das in der Nähe einer später geformten Biegung gestanzt wird, bewegt sich nicht; eine Biegung, die in der Nähe eines später gestanzten Lochs geformt wird, kann die Lochposition verschieben. Die Sequenzierung ist der Punkt, an dem sich Erfahrung im Werkzeugbau zeigt, und sie ist der Grund, warum dasselbe Teil in einem Layout perfekt läuft und in einem anderen driftet.
Streifenbreite: Die Zahl, die oft falsch berechnet wird
Die Streifenbreite scheint trivial – Teilbreite plus Rand – aber sie ist eine anspruchsvolle Berechnung. Der Streifen muss breit genug sein für das Teil, die Brücken, die Piloten und das Umformen, das Material seitlich zieht. Er muss auch innerhalb der Werkzeugbreite und der Standard-Coilbreiten bleiben, da der Kauf nicht standardmäßiger Coilbreiten einen Aufpreis kostet und Abfall erzeugt.
| Streifenelement | Was es zur Breite hinzufügt |
|---|---|
| Teilebreite | Das Teil selbst, gedreht wie im Layout |
| Seitenbrücken | 1,5–2,5× Dicke pro Seite |
| Pilotlöcher | Löcher in Träger- oder Brückenzonen |
| Umformzugabe | Material, das durch Biegungen seitlich gezogen wird |
| Bandverzugszugabe | Versicherung für Vorschubgeradheit |
| Schlitztoleranz | ±0,1–0,3 mm auf Coilbreite |
Wichtigste Erkenntnis: Breitenfehler zeigen sich als Ausschuss, nicht als offensichtlicher Defekt – ein leicht zu schmaler Streifen unterversorgt die Umformstationen und erzeugt intermittierende Verformungen, die bei einem Teil die Prüfung bestehen und beim nächsten durchfallen. Die Breite wird, wie das Layout, vor dem Schneiden des Stahls entschieden und nur durch Werkzeug-Nacharbeit korrigiert.
Materialausnutzung und Ausschuss
Ausschuss ist das Geld, das das Werkzeug verlässt. Das Skelett – der nach dem Freistanzen verbleibende Streifen – macht typischerweise 30–50% des Coils bei einem einfachen Layout aus, weniger bei einem eng verschachtelten. Teile eng zu verschachteln, Schnittlinien zwischen benachbarten Teilen zu teilen und den Träger wirtschaftlich zu nutzen, erhöht die Ausnutzung. Progressivwerkzeuge können auch zwei Teile pro Teilung in einer Reihe oder mehrere Reihen stanzen, wenn das Volumen es rechtfertigt.
| Layout-Ansatz | Typische Ausnutzung | Am besten geeignet für |
|---|---|---|
| Einreihig, breite Brücken | 40–55% | Einfache Teile, geringes Volumen |
| Einreihig, enge Verschachtelung | 55–70% | Die meisten Produktionsteile |
| Mehrreihig / Mehrfachausstoß | 60–75% | Kleinteile mit hohem Volumen |
| Geteilte Schnittlinien | +5–15% gegenüber getrennt | Symmetrische benachbarte Teile |
| Trägerwiederverwendung | Abhängig vom Teil | Teile mit geformtem Träger |
Wichtigste Erkenntnis: Die Ausnutzung ist eine Abwägung zwischen Teilgeometrie, Teilung und Pressgeschwindigkeit. Mehrfachausstoß-Werkzeuge erhöhen die Werkzeugkosten, können aber die Ausgabe pro Hub verdoppeln; bei einem Hochvolumen-Kontakt amortisiert sich der Werkzeugaufpreis in Wochen.
Was ein Werkzeug teuer macht
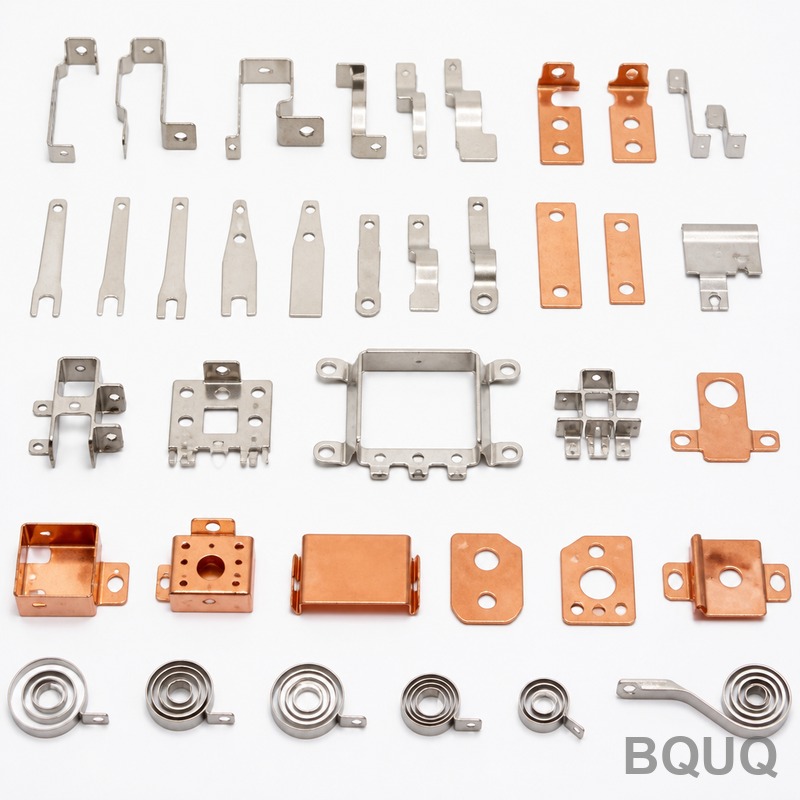
Die Werkzeugkosten folgen der Stationsanzahl, der Präzision und den Merkmalen – nicht der Teilegröße. Ein einfaches Stanzwerkzeug kann einige tausend Euro kosten; ein 15-stationäres Progressivwerkzeug für Kontakte mit Umformen, Prägen und engen Toleranzen liegt typischerweise im fünfstelligen Bereich; ein großes Automobil-Progressivwerkzeug mit Sensoren und feiner Teilung kann sechsstellig werden. Präzisionskosten entstehen durch gehärteten Werkzeugstahl, Schleifen, drahterodierte Details und die Einfahrzeit zur Abstimmung von Rückfederung und Timing.
Da die Werkzeugkosten die Barriere sind, die Stanzen von einem Prototypenprozess fernhält, ist die Designphase der Ort, an dem Geld gespart wird: Ein Layout, das eine Station entfernt oder eine Toleranz lockert, entfernt echte Kosten vom Werkzeug. Senden Sie die Teilezeichnung mit tatsächlichem Jahresvolumen und Toleranzen, und ein Stanzwerk kann den Streifen layouten, die Stationen zählen und das Werkzeug anbieten, bevor Sie sich festlegen. Auf unserer Stanzlinie beginnt jedes Progressivwerkzeug-Programm mit dieser Layout-Überprüfung – das Werkzeugangebot und das Teileangebot stammen aus demselben Streifenplan, unter derselben ISO9001-Dokumentationskette.
Häufig gestellte Fragen
F: Was ist der Unterschied zwischen einem Progressivwerkzeug und einem Transferwerkzeug?
A: Ein Progressivwerkzeug führt Coil-Streifen kontinuierlich zu und Teile bleiben bis zum finalen Freistanzen am Streifen befestigt. Ein Transferwerkzeug schneidet Rohteile frei und bewegt sie mechanisch zwischen den Stationen – besser für große oder tiefgezogene Teile, die nicht auf einem Streifen reiten können.
F: Warum braucht ein Progressivwerkzeug Pilotlöcher?
Piloten registrieren den Streifen an jeder Station neu, sodass Merkmale unabhängig von Zuführschwankungen ausgerichtet bleiben. Ohne Piloten hängt die Genauigkeit vom Bandverzug des Coils und der Wiederholbarkeit des Zuführgeräts ab, was für eng toleriertes Stanzen nicht ausreicht.
F: Wie wird die Streifenbreite für ein neues Werkzeug berechnet?
Teilebreite plus Seitenbrücken von etwa 1,5–2,5× Materialdicke, plus Zugaben für Pilotlöcher und Umformen, plus Rand für Bandverzug und Schlitztoleranz. Die Layoutzeichnung definiert sie präzise; der Werkzeugbauer dimensioniert das Werkzeug darum herum.
F: Was ist eine typische Materialausnutzung beim Progressivstanzen?
Vierzig bis siebzig Prozent ist der praktische Bereich: einfache einreihige Layouts laufen bei 40–55%, enge Verschachtelung erreicht 60–70%, und Mehrfachausstoß-Layouts für kleine Hochvolumenteile können höher liegen. Das Ausschussskelett ist die Hauptvariable, die ein Layout steuert.
F: Wie viele Stationen hat ein typisches Progressivwerkzeug?
Ein einfaches Teil benötigt möglicherweise 3–6 Stationen (Stanzen, Beschneiden, Formen, Freistanzen); ein Steckverbinderkontakt mit mehreren Biegungen und Prägevorgängen läuft oft mit 10–20; große komplexe Automobilteile können mehr überschreiten. Die Stationsanzahl ist der größte einzelne Treiber der Werkzeugkosten.
Verfasst vom BQUQ Engineering Team. BQUQ ist eine ISO9001-zertifizierte Quellenfabrik in Dongguan, China, die CNC-Bearbeitung, Metallstanzen, kundenspezifische Federn, Kühlkörper und Spannzangenlinien unter einem Dach betreibt. Senden Sie Zeichnungen an sc@bquq.com oder WhatsApp +86 13713157787 für ein Angebot innerhalb von 12 Arbeitsstunden. www.bquq.com